Sew a Felt Animal

Little felt animals are so much fun to sew!
Download this free pattern, learn a few easy techniques and get started making your own little monkey friend.

Also, be sure to visit the little dear YouTube channel for a complete, felt animal sewing video tutorial!
For this tutorial, I'm using the Felt Monkey from my Chinese Zodiac set. You can download the Monkey pattern for FREE from the Downloads Vault when you join my mailing list!
Although 2016 was the actual Chinese "Year of the Monkey", this is still one of my favorite patterns!

Just subscribe at the bottom of this page to download the file from the subscriber's Free Downloads Vault, and follow along with the instructions below.
First, gather your supplies.
You will need:
light brown and medium brown felt, wool or wool blend is the best
(*My FAVORITE felt comes from Benzie Design!)
embroidery floss: black, white, pink, dark pink, red, reddish brown, light brown
tissue paper
small sharp scissors
stuffing
Instructions:
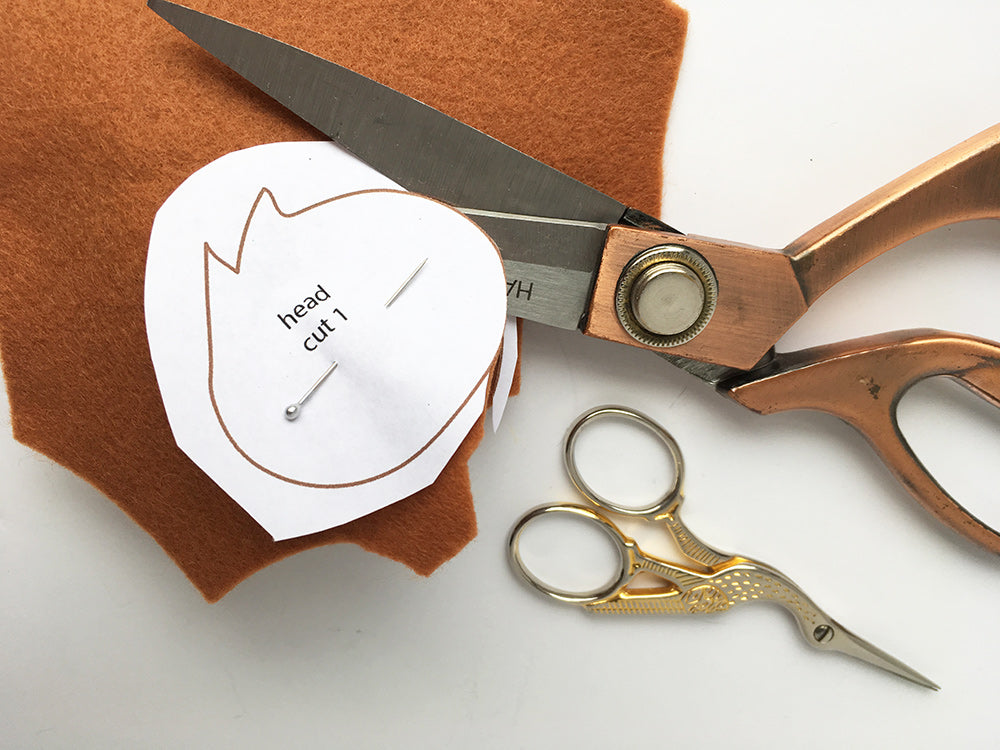
1. Use the monkey pattern piece templates to trace and cut the pieces you’ll need from felt. Cut the face, chest and tail pieces from light brown and the rest from medium brown. I find it easiest to cut the pattern out loosely, then cut through the paper and felt together. Sewing scissors will come in handy for cutting out the smallest pieces.
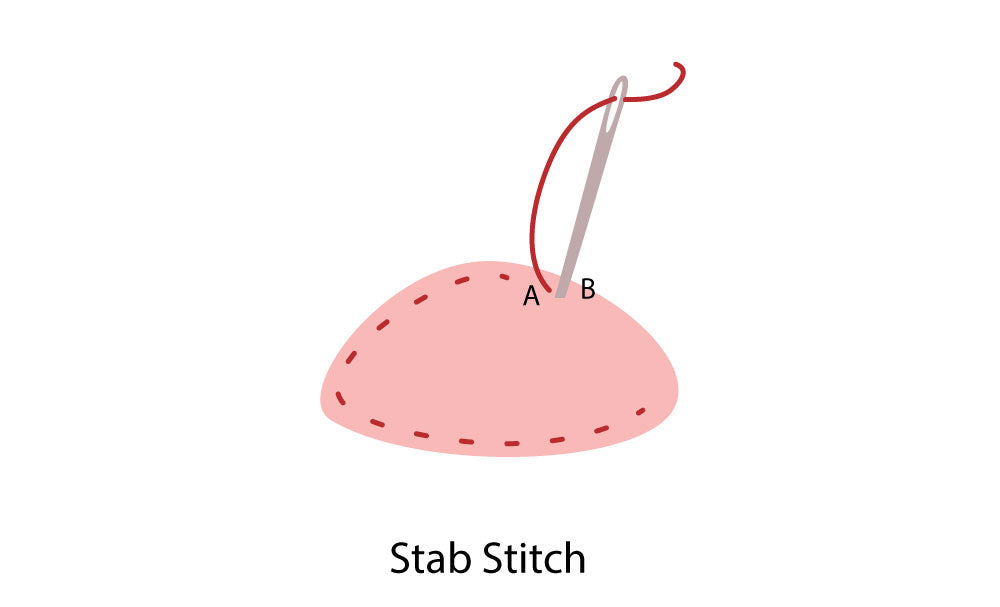
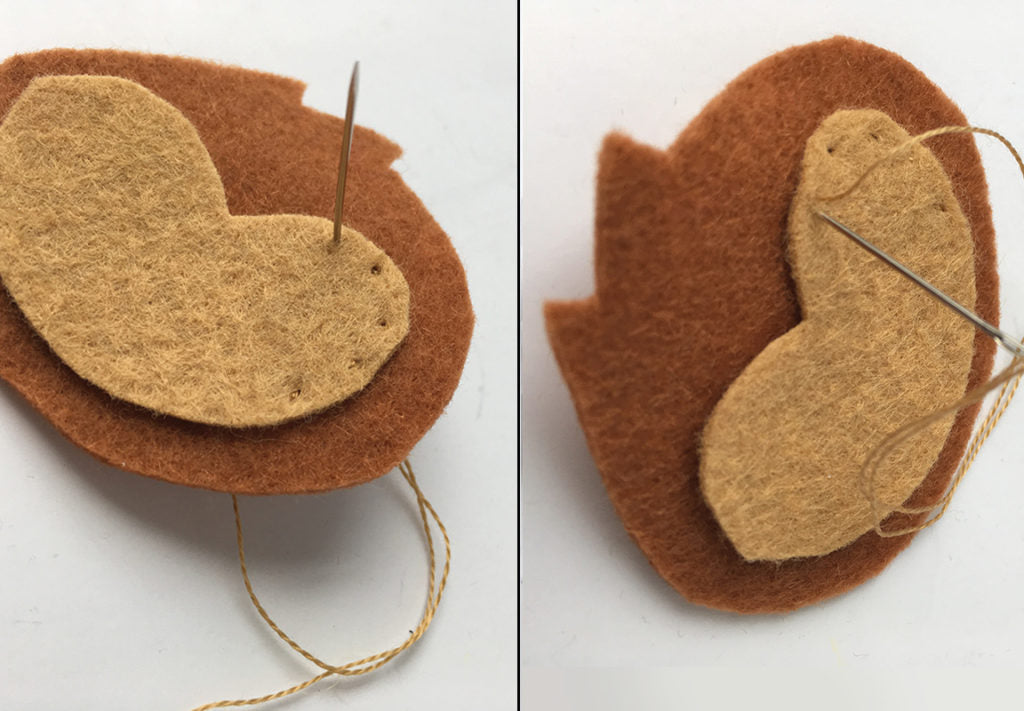
2. Position all the felt pieces together and stitch them in place with the Stab Stitch using 1 thread of floss matching the felt colors. For the Stab Stitch, below, just make tiny stitches (from A to B) all around the edge of the felt piece. Stitch the face onto the head and the chest and leg onto the body. Stitch the tail piece behind the left side of the body and head. Set the ears and back piece aside.
3. Now add embroidery. You can freehand it, or try one of my favorite techniques:
Trace the embroidery pattern onto tissue paper and pin the paper in place to the front felt piece. Stitch through both paper and felt and when you’re done, carefully tear away the paper.


I've used the Split Stitch (on the tail), Lazy Daisies, French Knots, Satin Stitch and Straight Stitches. You can find an easy guide to hand embroidery and some stitch diagrams in the Embroidery DIY tutorials!

What about eyes? It can be little tricky at first to get your eyes to come out even and round.

Here are a few tips on how to stitch little round eyes with the Satin Stitch.
Start with the longest stitch in the center of the circle. Starting at the center and working out makes it a lot easier to keep your circle even.
Now add two slightly shorter stitches on either side. I've spaced them out in this pic so you can see what I mean, but it real life there will be no space in between.
Keep adding shorter and shorter stitches on the outside of those. How many more you need will depend on how large your eye is, and also how many threads of floss you're using.
If it's not coming out right, feel free to go back and add an extra stitch (or several) over the top to even it out.
Add another tiny stitch in white, crossing the other stitches for a little shine. Don't pull this one too tightly, just let it sit on top of the others.
Now you're ready to sew your monkey all together!
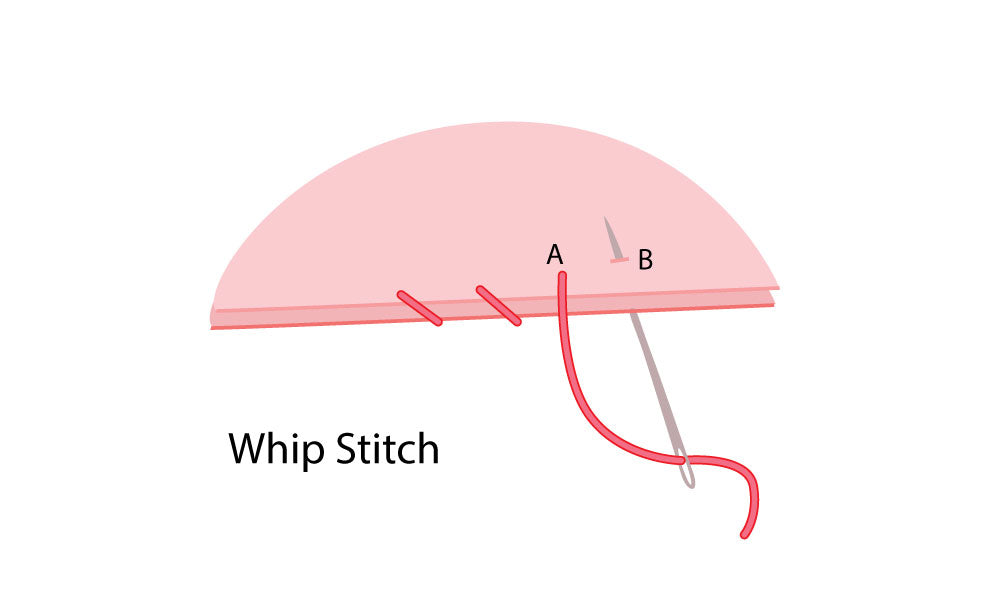
4. Line up the front and back parts of the monkey and sew them together around the edge using the Whip Stitch with 1 thread of brown floss. For the Whip Stitch, below, begin with a knot in between the felt layers, bring the needle and thread out at A, over the edge and back up through at B.

Remember those little ears? As you stitch around the head, tuck an ear in between the layers on each side. Leave one inch open at the bottom and tuck some stuffing inside. Use just enough stuffing to make it pillowy, not so much that the seams pull apart. I left the tail part flat.

If you're short on stuffing (or don't want to buy a huge bag of it) you can cut your felt scraps into tiny pieces and stuff your animal with those!

When you've sewn all around the edge, make a loop with your thread and tie a little knot right at the seam.

To hide your knot and extra thread, push your needle into the seam right by the knot and out the felt at the back. Pull the extra thread all the way through. The knot will be pulled inside too.
Now snip off the thread close to the felt. The end of the thread will slip inside so you won't even see it..
Visit our Felt DIY tutorials for lots of fun ideas for what to make with your felt friends.
I love making mini felt animals so much that I now have patterns for over 50 of them in available in the little dear shop (and I'm adding more all the time!)
Go pick out your favorites and stitch up a menagerie of your own.


